The Portal onboarding process involves the following:
Device Enrolment
Device Tagging Request Approval
Kiosk Mode
Device Enrolment
Device Enrolment enables an admin to create a “user-device” relationship. This basically means mapping or simply put, assigning a device to a user such that only the user or users that have been mapped to a device can access (Log in) the device.
To enrol a device on the portal;
Login to SMARTMDM portal, navigate to Device Enrolment > select Enroll a device page from the Device Enrolment sub-menu options. Click on SINGLE DEVICE ENROLMENT.
When the device enrolment page is displayed, the user will be required to select their preferred enrolment option from “Single device enrolment” and “Bulk device enrolment”.
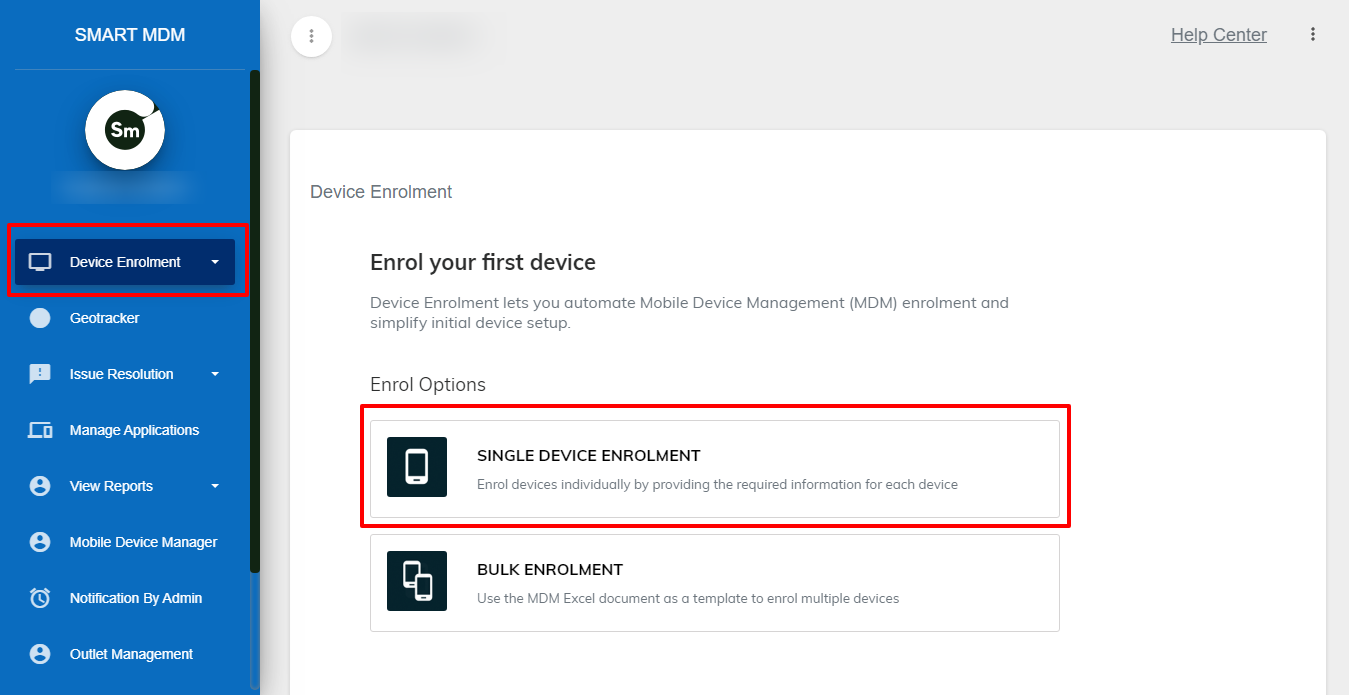
Fig. 1- Select the “Single device enrolment” option
2. Select Device platform from the list of device platforms available
The user can select either of the two options available depending on their device type (Android or Windows)
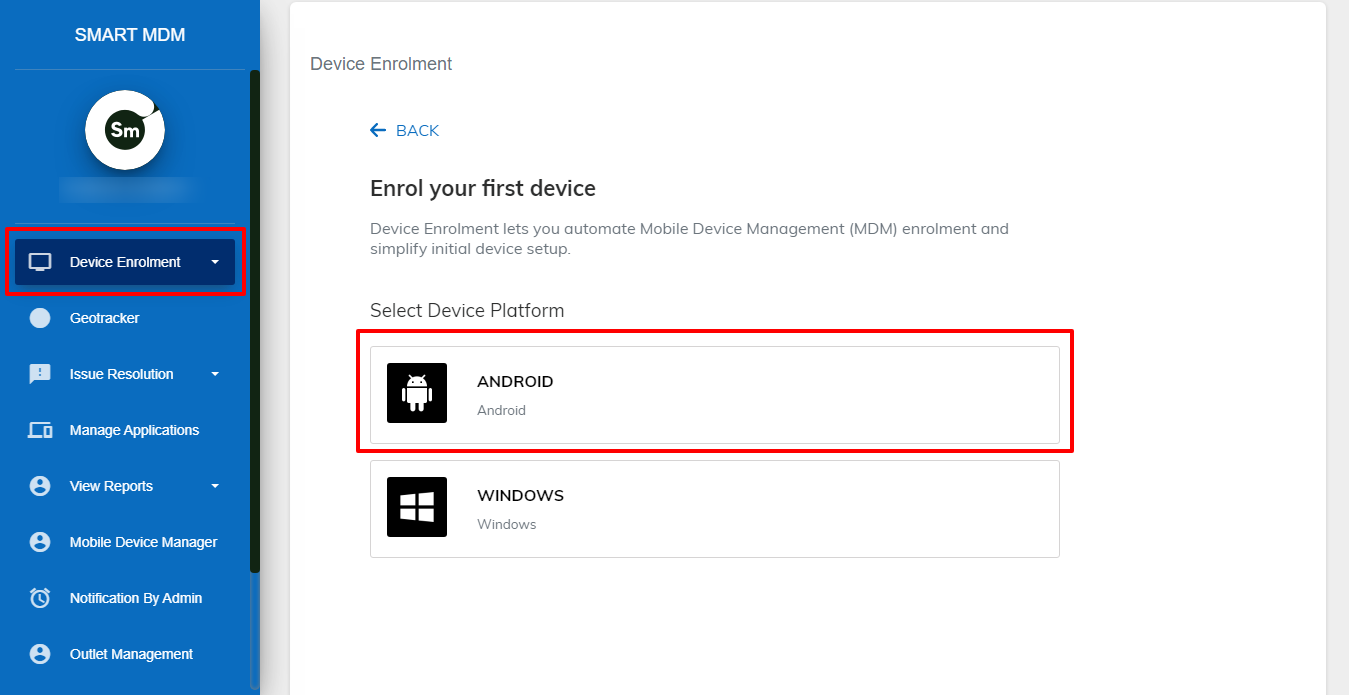
Fig. 2 - Select “Android” platform
3 (a). On clicking on the preferred device platform, a form is displayed that allows the user to enter details of the device. This is where the actual “user-device relationship creation” happens.
This section requires a user to fill out details of the device to be enrolled. It is a multi-step form. The first step as shown in Fig. 3 below requires the user to enter information regarding the IMEI number, MAC Address (This is an optional field), Agent, Outlet & Channel partner for which this device will be mapped to.
How to get your device IMEI number on Android
Tap on Settings on your Android device
Tap on About Phone or My phone
Scroll down and you should find the number listed under IMEI (For phones that allows 2 SIMS, you would find the IMEI number for both slots)
How to get your device MAC Address on Android
Tap on Settings on your Android device
Tap on About Phone or My phone
Scroll down to WiFi MAC Address this is your device' MAC Address
How to get your Device ID on Windows
On your search menu, type in About your PC
Double click on About your PC you should see your device ID displayed
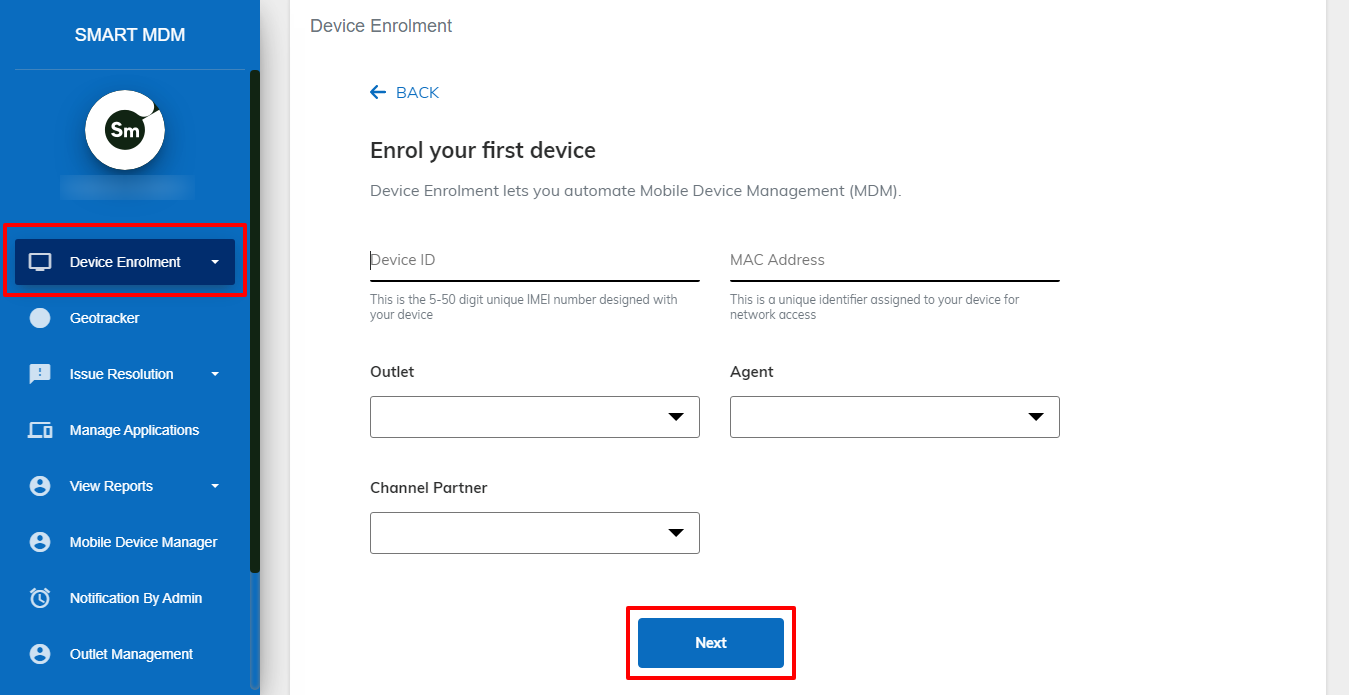
Fig. 3 - Enter details of the device - form 1
3 (b) Page 2 of the form allows you to map the device to a location and a group.
Specifying the location that a device will be used is required to aid the enforcement of geofence policies. This ensures that when an agent goes outside their predefined location (geofence) they will not be able to the device.
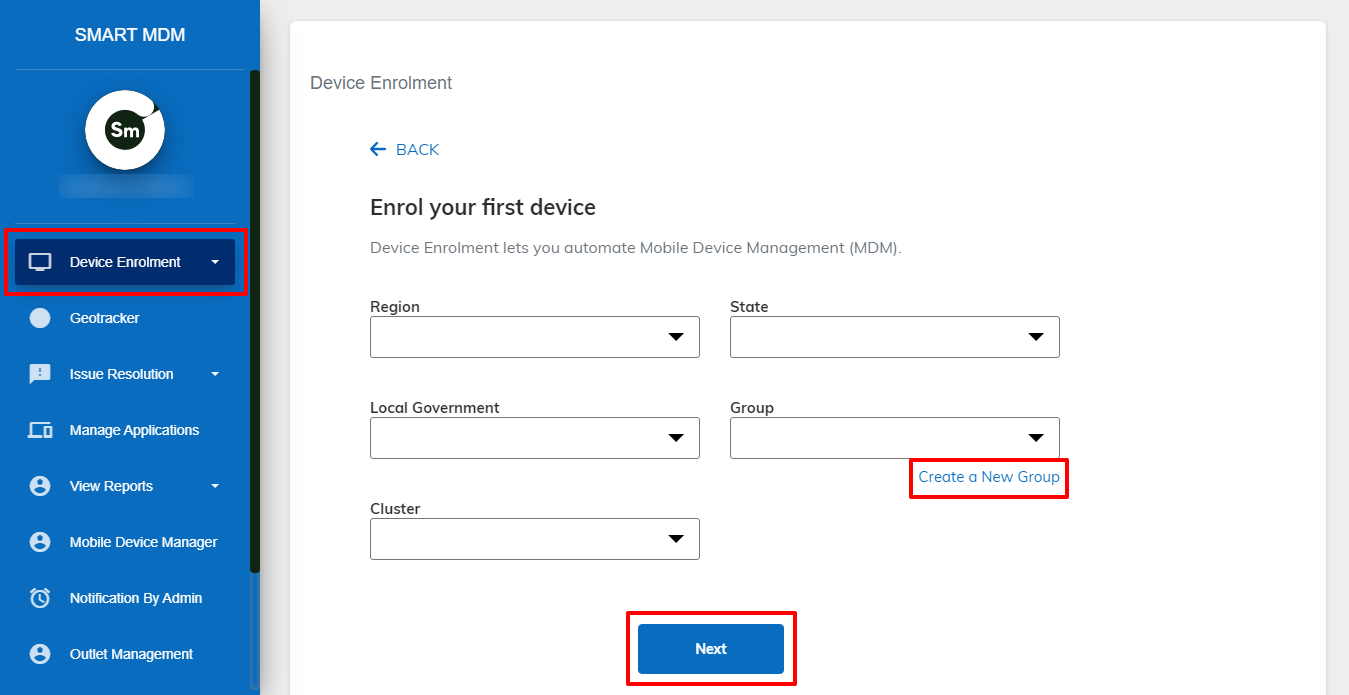
Fig. 4 - Enter location details of the device - form 2
3 (c) - You can add the device to an existing group by selecting from the drop-down selection of the “Group” field or click “Create a New Group” if you intend to add the device to a new group
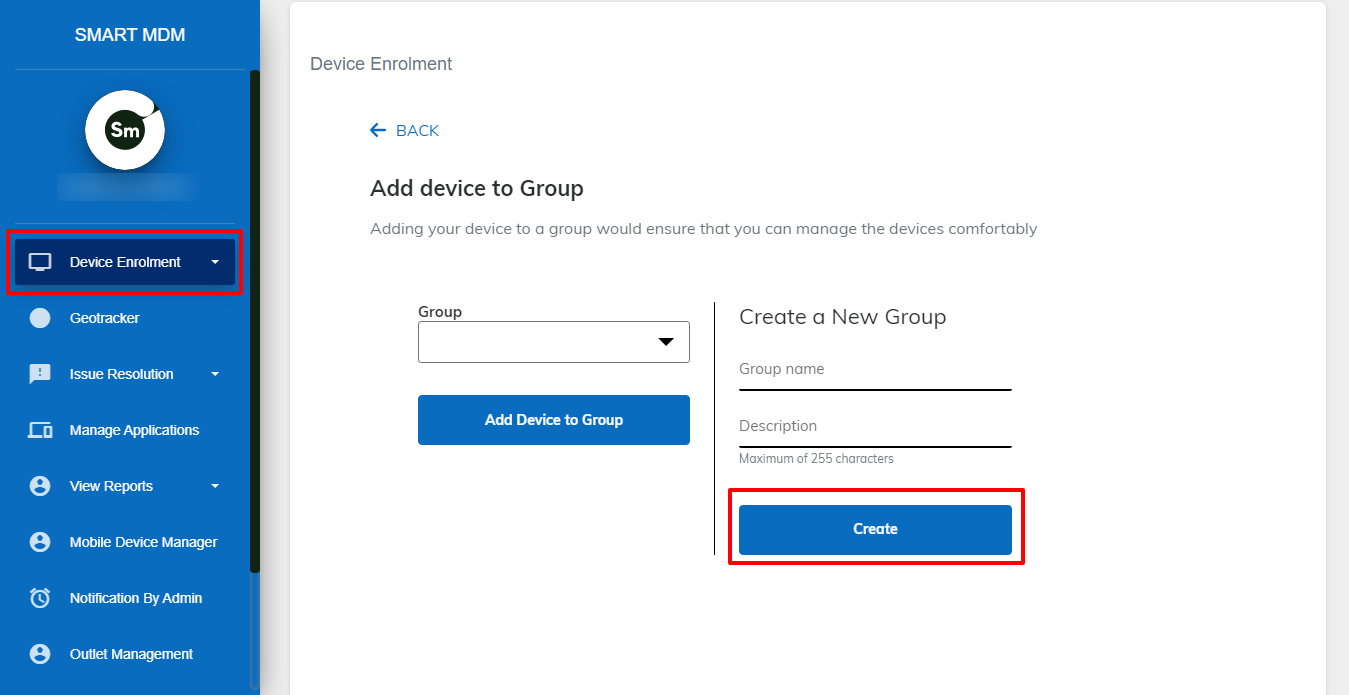
Fig. 6 - Create a new group
4. Preview Page
This page enables the user to preview the details of the device they are about to enrol and confirm that the details entered are correct.
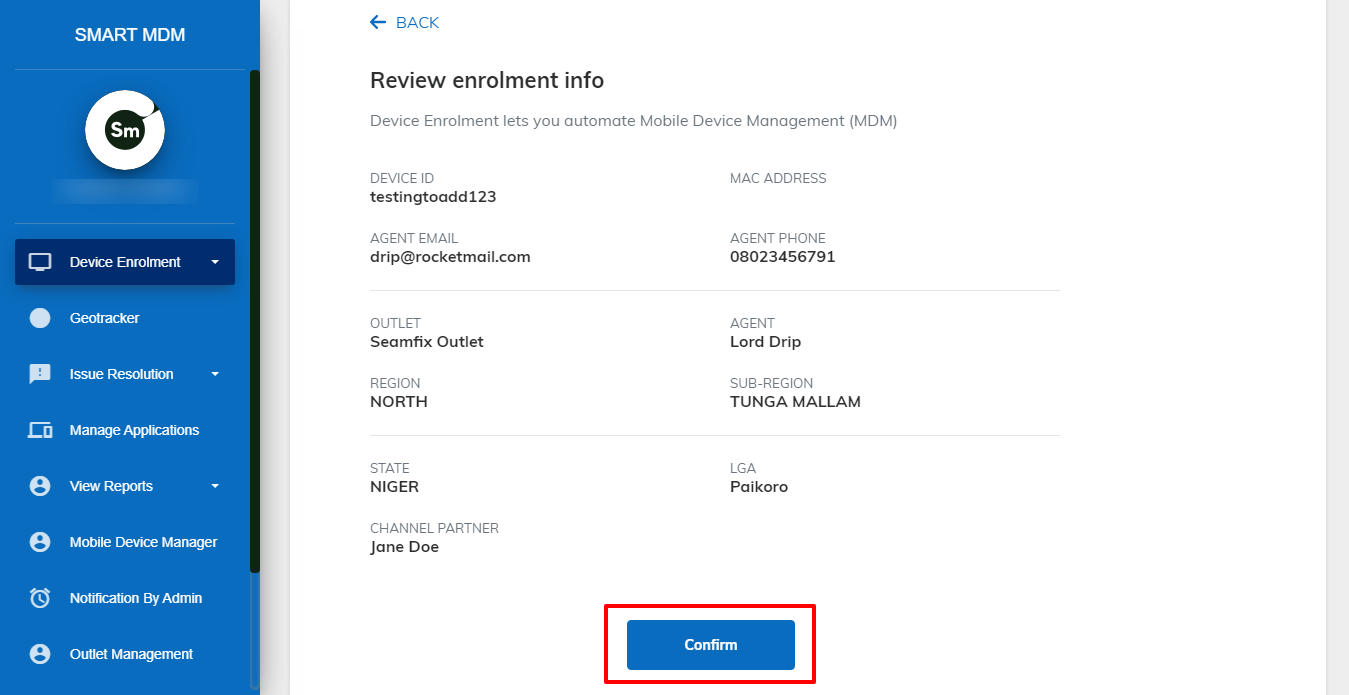
Fig.7 - Preview Enrollment details
5. Device Enrollment successful
When a device has been successfully enrolled, The device is added to the “Enrolled devices” bank. The user can switch between “Devices” and “Groups” to see all the devices and groups they have created.
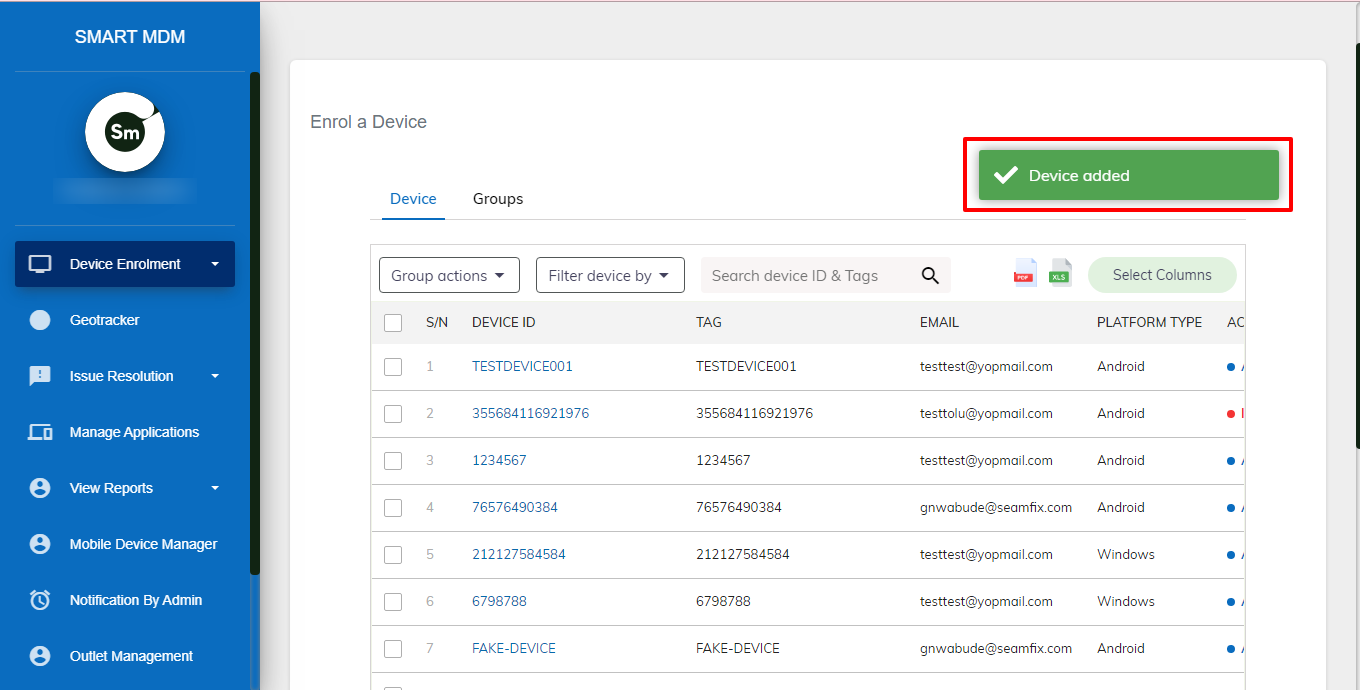
Fig. 7 - Device successfully enrolled
Bulk Device Enrolment
Where a user decides to enrol more than one or two devices, the bulk device enrolment option will suffice.
Follow these steps:
Login to SMARTMDM portal, navigate to Device Enrolment > select Enroll a device page from the Device Enrolment sub-menu options. Click on BULK DEVICE ENROLMENT.
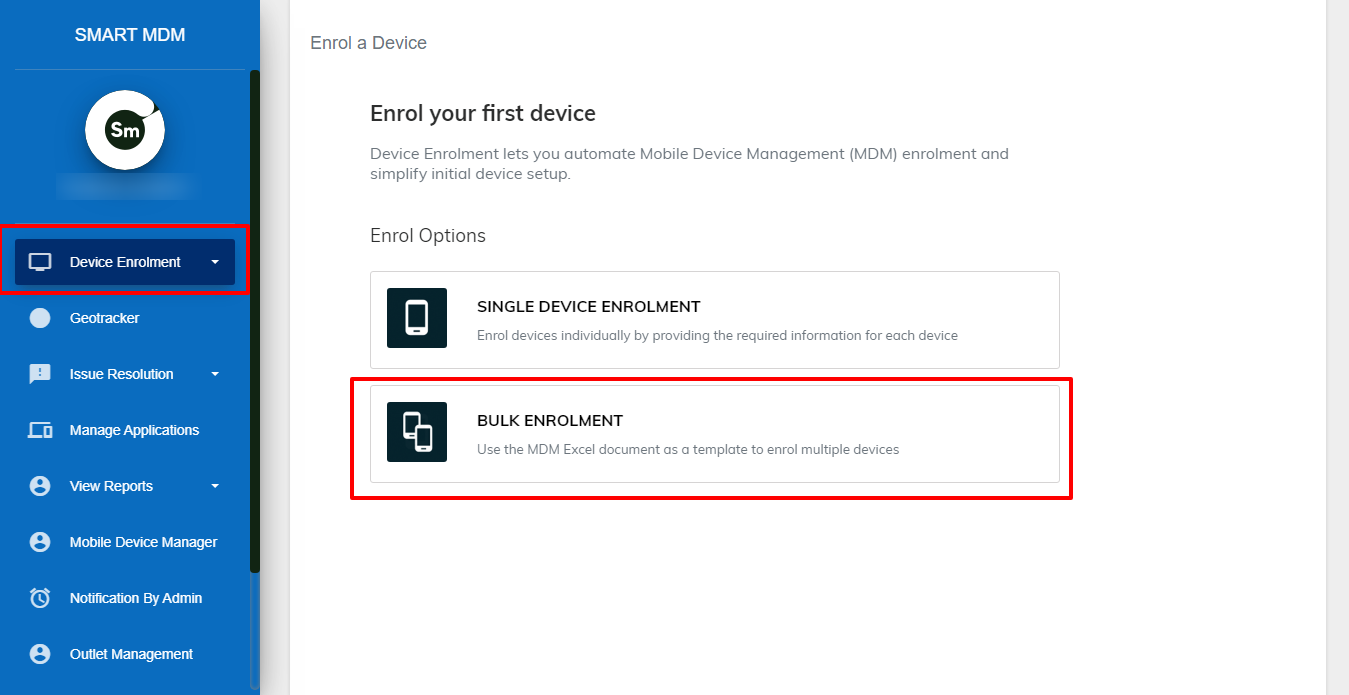
Fig. 1 - Select Bulk Enrolment
2. Click Download Enrolment Template
The Bulk enrolment template is an Excel sheet. The user is expected to download it and fill out the columns with the correct details. With the template, a user can enrol up to 1000 devices at a time.
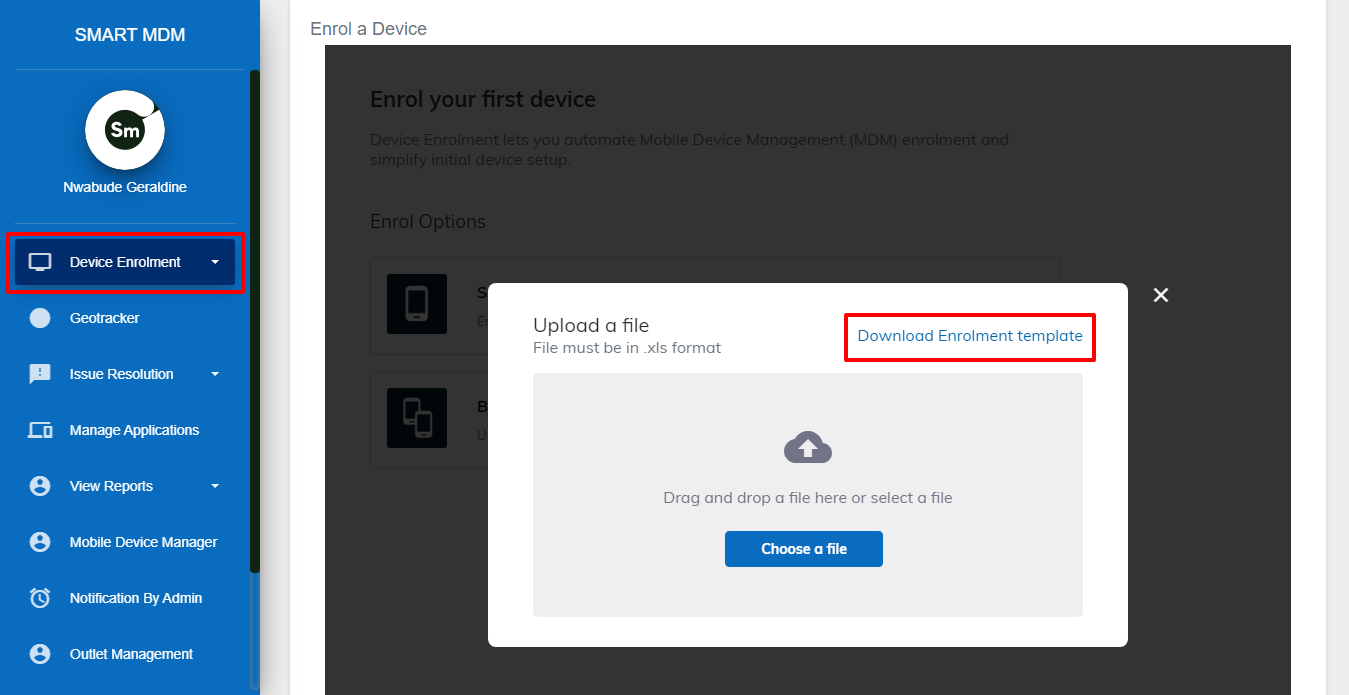
Fig. 2 - Select “Download Enrollment template”
3. Fill out downloaded template
When the user clicks on “Download enrolment template”, The template downloads on their computer and can be accessed from the “downoads” folder. Every other column apart from Device ID & Mac address, are drop down selections. But for these two, the user is expected to type in the data by the data.

Fig. 3 - Device Enrollment template
4. Upload filled out template
Click on the “Upload” button as shown in Fig. 4 below and attach the “correct” filled out template.
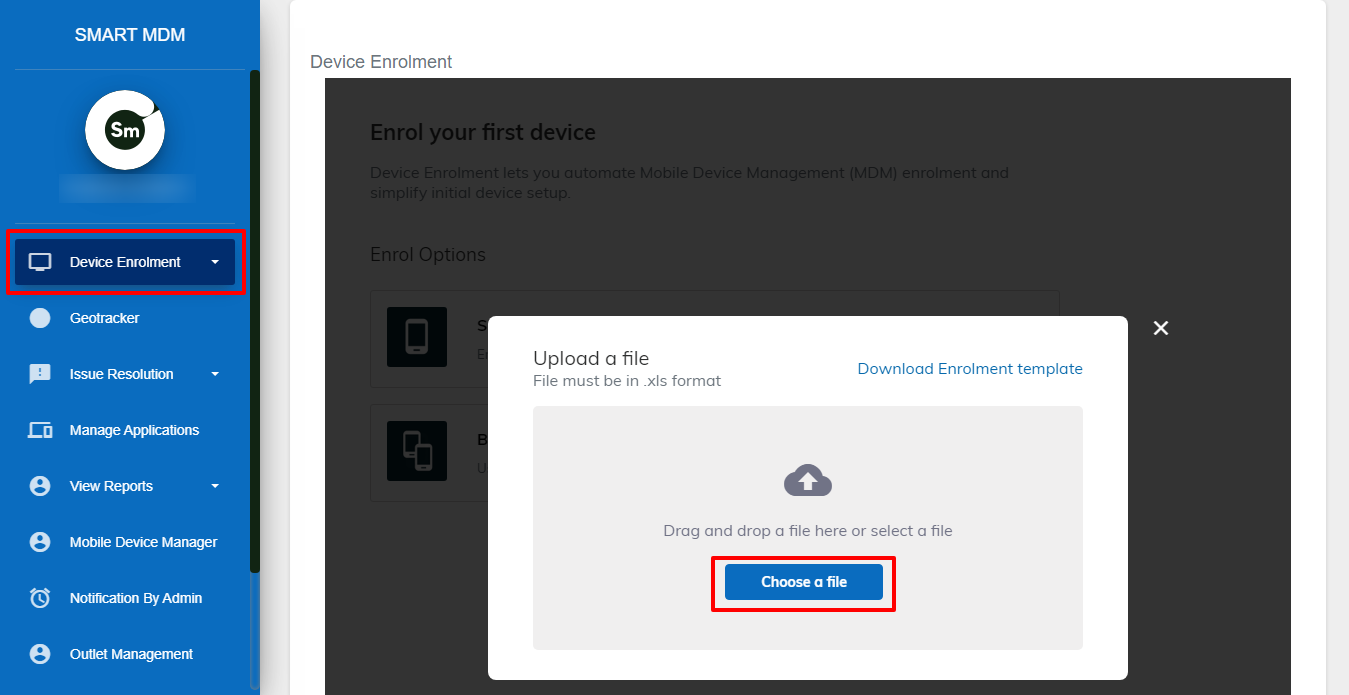
Fig. 4 - Upload completed template
5. Bulk enrolment Result
When the user fills out the template (Fig.3) and upload (Fig. 4), the sheet automatically downloads with the result as shown in Fig. 5.
Note: Pay attention to the result column right after “Select Device Groups” this is where you can view enrolment that was successful & those that failed. In the case of Fig. 5 below, you can see “Device has been successfully tagged” this means that the devices were enrolled successfully.
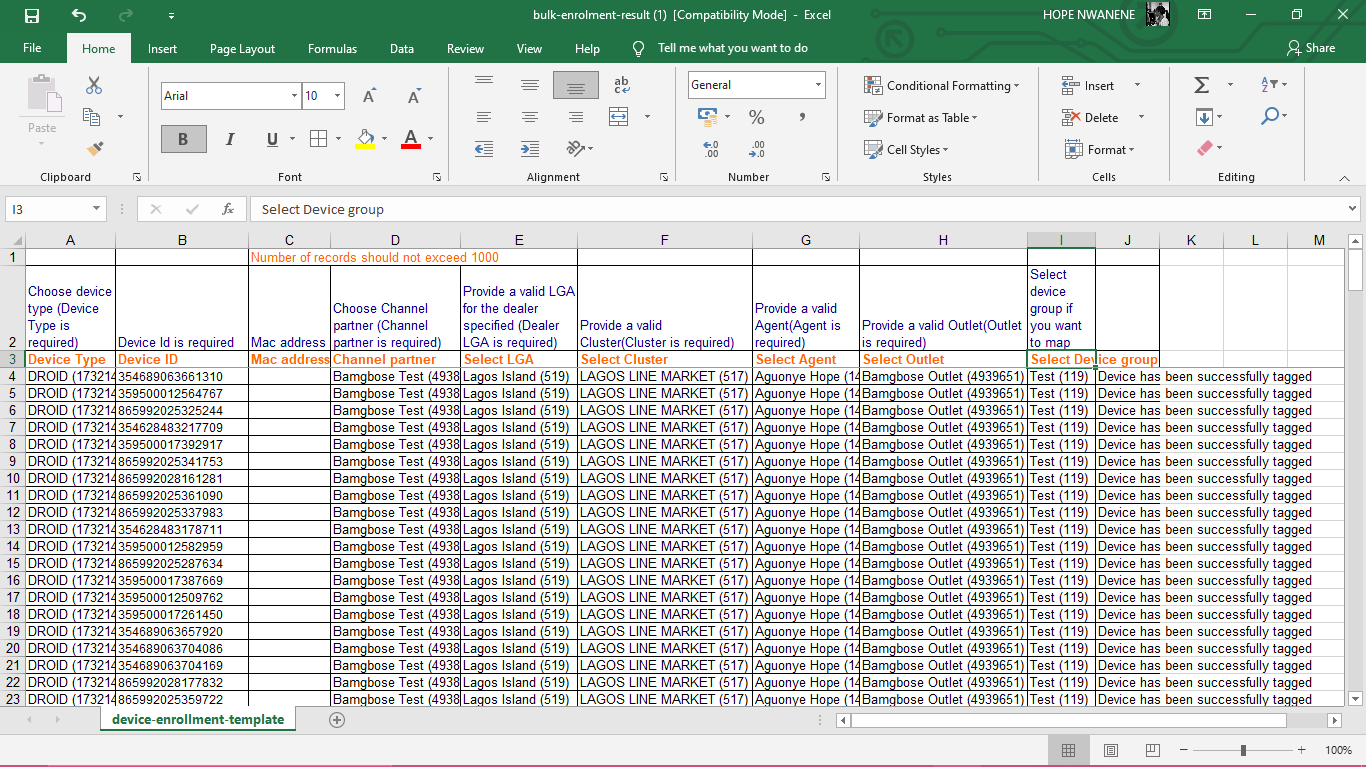
Fig. 5 - Bulk enrolment result.
Exceptions
There are a number of reasons why the bulk enrolment process could fail
All fields are compulsory except the “Mac Address” column. If the user fails to fill out a required field, the enrolment for that particular device will fail.
If a user doesn’t have available enrollment allocation, they will be unable to enrol devices.
Using a random excel template other than the template provided on the portal to enrol devices will cause the process to fail.
Device Tagging
For a user to be able to access the SmartMDM app on their device whether, on Windows or Android, they have to first tag thier device. This is like giving this device it’s own unique identity so that the admin is able to identify as well as manage them properly.
Basically, the tagging process enables the admin to recognise nd onboard the new device using their Device ID or IMEI. The tagging process can be done in two ways:
Self Enrolment
In this process, the tagging process starts with the agent who installs the SmartMDM application on the device before his device is enrolled on the portal. In this scenario, the SmartMDM application automatically sends a tag request to our system. This request is displayed on the portal; Device Enrolment>Tag Requests, The admin would be required to approve this request before the device can be successfully tagged.
Also important to note is the fact that while attempting to tag requests from “Self Enrolments”, the admin will be required to create a user-device-relationship. This means that for an admin to be able to approve a tag request, they have to create an agent for which the device is to be mapped to.
There is also an option to approve bulk tag requests. If the user has a lot fo tag requests to approve, they can download the “bulk tag approval template”. This would allow them to enter all the required details at once.
Once this is done, the device would be considered tagged & then the agent can go ahead and login to their device. Find below the step by step process of achieving this.
<<Insert screenshot of tag approval view>>
Exceptions
Downloading the wrong build can cause this process to fail. This is why, when you download a build make sure to confirm that you’re attempting to tag your device in the right environment. For instance, if you download a POC build then tag your device on https://smartmdmpoc.9mobile.com.ng/simrop. If you downloaded a Production build, however, tag your device on https://smartmdm.9mobile.com.ng/simrop
Kiosk Mode
The first step to remotely controlling a device is enabling kiosk mode (See Android Onboarding page) on the device. Kiosk Mode is a lockdown mechanism accessible on Android devices to run just a solitary application or a predefined set of applications. After enabling Android Kiosk Mode, all different applications and device functionalities like status bar, notifications bar are disabled and clients will likewise be restricted from making any changes to the device settings.